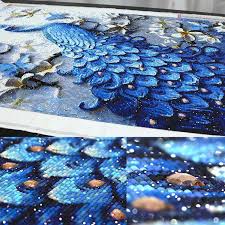
Creating your own diamond painting Harry Potter art is a magical experience that combines the joy of crafting with the excitement of one of the most beloved franchises in the world. Whether you're looking to depict Hogwarts, your favorite character, or a memorable scene, the process involves precision and creativity. Here’s how you can embark on this enchanting journey and craft a masterpiece that would make any Potterhead proud.
Choose Your Design
Selecting the Perfect Image: The first step is to choose the right image. You want a high-resolution image that captures the essence of the Harry Potter world. This could be an iconic scene like Harry's first Quidditch match or a close-up of a beloved character like Hermione Granger. Make sure the image is at least 1000 pixels in width and height for a clear, detailed finish.
Converting the Image: Use an image converter specific for diamond painting, which you can find online. These converters help you adjust the color palette and simplify the image to suit the pixelated nature of diamond painting.
Purchase a Custom Kit
Once your image is ready, the next step is to order a custom kit. You'll need to upload your Harry Potter image to a site that offers custom diamond painting kits. Make sure to specify the size of the canvas; larger canvases tend to provide better detail, with recommended sizes starting at 40x50 cm for clearer images.

Prepare Your Workspace
Organize Your Materials: When your kit arrives, sort out your materials. You should have a canvas, colored resin diamonds (also called drills), a diamond applicator pen, wax or gel for picking up the drills, and a tray.
Set Up a Good Lighting Source: Good lighting is crucial for seeing the small symbols on the canvas and placing the drills accurately. A daylight LED lamp can significantly enhance visibility, making the process less straining on the eyes.
Start Crafting
Understand the Canvas: Your canvas will be covered with symbols that correspond to different colors of drills. It’s often divided into sections if the design is large. Start from one corner and work your way across to keep things manageable.
Apply the Drills: Dip your applicator pen into the wax, pick up a drill, and place it firmly on its corresponding symbol. Press down to ensure it sticks. Repeat this process, enjoying the meditative rhythm of the craft.
Seal and Display
Once completed, it’s important to seal your artwork. Covering your finished diamond painting with a sealing spray or brush-on sealer will protect the drills from peeling off and help the colors stay vibrant.
Find the Perfect Frame: A good frame not only adds to the aesthetic but also preserves the painting. Choose a frame that complements the theme of your artwork.
For those looking to dive into creating their own diamond painting Harry Potter art, remember it’s about more than just putting drills on a canvas—it's about bringing a piece of the magical world into your home. Each diamond is a pixel in a larger image, each placement a step closer to Hogwarts.